Designer Insights: 12 Steps to a Typical Kitchen Remodel Process
Designer Insights: 12 Steps to a Typical Kitchen Remodel Process
The prospect of a new and improved kitchen is an exciting one, but taking the plunge isn’t always an easy decision. Our team at Bath + Kitchen, Washington, DC created this overview to help our clients understand what a typical kitchen remodeling process looks like based on our experience as a full-service design-remodel firm and authorized Dura Supreme Cabinetry Showroom.
Aside from the investment and inconvenience, two of the top fears around kitchen remodels are the fear of disappointment and the fear of being misled by a contractor. I believe these concerns should not hold you back from creating the kitchen of your dreams. Instead, I recommend doing your homework and learning as much as you can about the kitchen design process. When you understand the workflow, you will be in a position to collaborate successfully with your contractor and understand what’s happening at every step of your kitchen’s transformation.
See this video for a great example of a kitchen remodel project by Bath Plus Kitchen.
Step 1: Set goals for your remodel
What are you hoping to achieve through this kitchen remodeling project? Here are a few goals our clients often share with us:
Creating a kitchen that suits their lifestyle
Increasing resale value
Incorporating smart appliances to create a more future-friendly kitchen
Improving functionality, so home-cooked meals become an inviting option
Updating the space’s look, especially for older kitchens
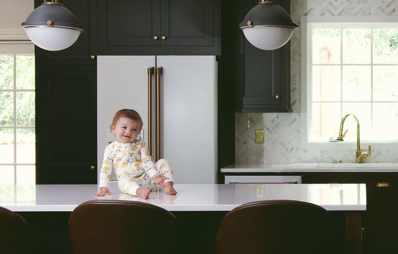
Defining a goal will help you share your vision more clearly with your kitchen remodeling contractor. It helps to write it out as a goal statement and share it with everyone involved. You can then revisit the document at every step to ensure you’re on track and making choices in line with your vision. Very often, the remodel is planned with a big event on the horizon. For example, one of our clients in NW Washington, DC wanted theirs completed before their baby boy was born. We completed this kitchen remodel project with them in 8 weeks, just a few weeks before they welcomed the newest member of their family home.
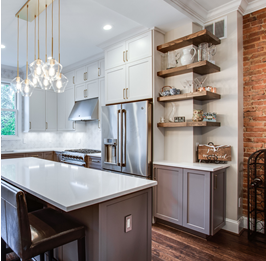
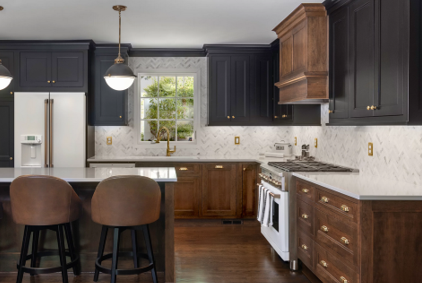
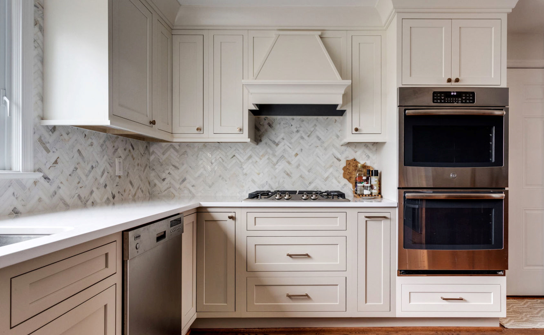
Dura Supreme Kitchen design by Bath Plus Kitchen
Step 2: Evaluate your existing kitchen
With a clear goal in mind, you can approach your Dura Supreme kitchen designer and together you can evaluate your goals and your existing kitchen. If you’re not sure how to evaluate them, start with these questions. At the Bath Plus Kitchen showroom, our selection process is a curated one that’s designed to ensure each project is a good match for the homeowner and the designer. If you explain your goals clearly, it will be easier for the designer to tell you if they will be able to execute the project to your satisfaction and budget.
Once you have identified your kitchen remodel team, you will need to work with them to assess your current kitchen. The aesthetics are the first thing to evaluate. Ask yourself what you love about it and what you want to change. In addition, consider these factors:
Space – do you have enough counter, cabinet, and floor space?
Flow – is it easy to navigate, cook with family members, and interact with guests?
Appliances – should you upgrade to energy-saving, easier-to-use appliances?
Accessibility – can family members of various ages and use it safely, including yourself as you get older? What about people with disabilities?
Children and pets – do you need to make any special provisions for them?
Step 3: Design your dream kitchen
With a clear vision of your future kitchen, you can proceed to the fun part – designing! Yes, you will need to be realistic, stick to your budget, and make adjustments for any limiting factors, but a good kitchen designer can help you find creative solutions to give you a kitchen you will fall in love with. It’s important to be flexible and open to new possibilities during the kitchen design process. However, you should also stand firm on what you really want. For example, what kind of layout works for you? If you’re not sure what your options are, explore the pros and cons of some tried-and-true kitchen design layouts.
At our Bath Plus Kitchen showroom, I like to set up a meeting with prospective clients at this point. Prior to the initial visit, we ask our clients to email us the following:
Photos of the current kitchen.
Inspirational photos and/or a summary of goals and design aesthetic.
Rough measurements and/or a sketch of the existing kitchen.
During this initial appointment, clients will be able to:
Meet and interview one of our designers to explain the project goals, learn how we work, and determine if we’re the best fit for the project.
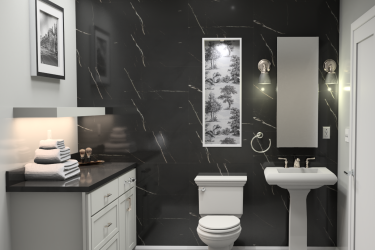
Touch, feel, see our cabinetry displays and samples. Our Dura Supreme Showroom features two kitchens and a remodeled bathroom to showcase our level of design and craftsmanship.
Settle on a rough budget for the project, depending on the size, scope, and level of materials required.
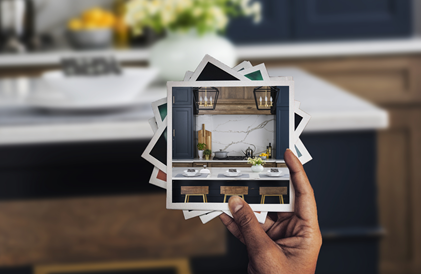
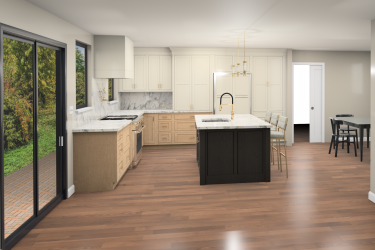
Once this is done, my designers go on to prepare plans for the job that include photo-realistic renderings for our clients. It’s a critical step because it will give you a clear picture of the kitchen you are planning.
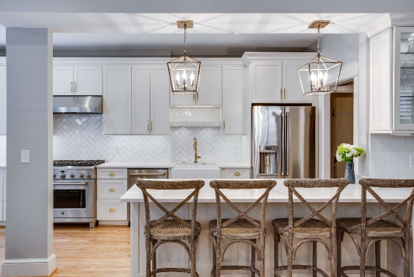
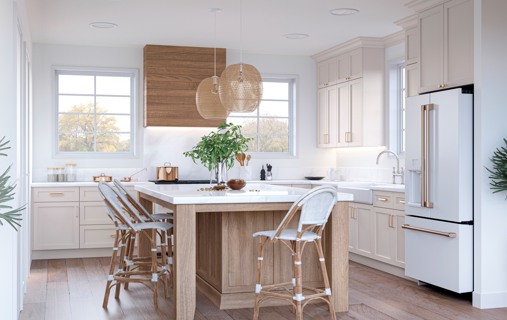
Dura Supreme Cabinetry design by Bath Plus Kitchen
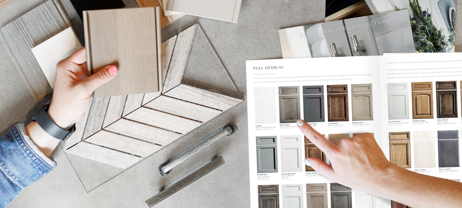
Step 4: Select your materials
Material selection is an integral part of the kitchen remodeling process. During this step, you will need to select materials that are functional, aesthetically pleasing, and that will suit your budget. Remember that this is an investment, and cutting corners here can make you unhappy with the final outcome. It’s essential to think long-term when it comes to choosing your flooring, appliances, cabinets, light fixtures, countertops, backsplash, and other kitchen elements.
That said, there are several incredible options to choose from that will suit your budget and needs. The Bath Plus Kitchen experts believe that kitchen cabinetry can make or break a kitchen design, which is why we offer fully custom and semi-custom cabinets from a top-rated manufacturer, like Dura Supreme Cabinetry. For example, many of our clients love the versatility of the Dura Supreme cabinets that we help them customize.
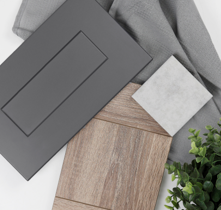
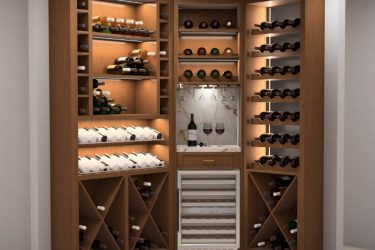
Dura Supreme Cabinetry shown in the Kips door style with the “Flint” Matte Foil and the Dash door style in the “Lodge Oak” Textured TFL
Step 5: Apply for building permits
Once the kitchen design plans are drawn up, you will need to apply for building permits. I work with clients from Virginia, Maryland, and Washington, DC, and know that requirements vary based on location. That’s why it’s always best to consult your local permitting office to ensure there are no oversights and potential code violations. Your designer can help provide you with advice and help you with this process.
Dura Supreme Cabinetry design by Bath Plus Kitchen
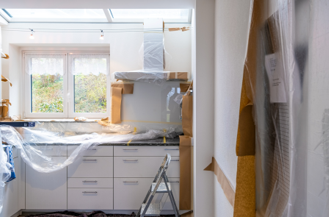
Step 6: Complete the demolition and re-evaluate
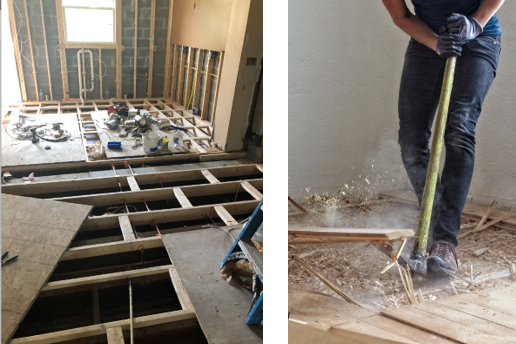
Here’s where the real work begins. Your remodeling team will start to remove your existing kitchen – floors, cabinets, appliances, and perhaps a few walls. A good team will minimize the mess and inconvenience, which will make a massive difference to you if you opt to live at home during this time. Once this is done, your team will inspect the kitchen to see if any adjustments need to be made due to unforeseen factors such as uneven floors and other construction flaws.
Flooring work in progress in a historic Washington DC home by Bath Plus Kitchen.
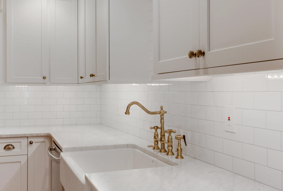
Step 7: Start the plumbing and rewiring (rough-in work)
This covers the framing, plumbing, and electrical work. At this stage of the kitchen remodeling process, the focus is on the walls of the kitchens and what goes into them. Since adherence to building codes is essential here, it’s important to let the professionals decide the best way forward. A professional inspection will happen once the work is done to ensure that your remodel is up to code so the project can continue.
A beautiful corner sink in a Dura Supreme kitchen designed by Bath Plus Kitchen
Step 8: Finish the walls, doors, and windows
Once you pass the inspection, you can complete the walls. This will entail hanging, taping, finishing, and priming drywalls. Doing a thorough job here will make the next steps of the kitchen remodeling process smooth sailing. After this, you can move to the doors and windows; finishing these will ensure your measurements for the kitchen cabinetry are correct.
Step 9: Complete the flooring
Contractors choose to do this at different points during the kitchen remodeling process. Some believe it works better if done after the cabinetry, while others recommend prior. We like to make a recommendation based on each project and its unique requirements. To decide on your flooring, look up a range of options for inspiration, from the classics to the trends.
Dura Supreme Cabinetry design by Bath Plus Kitchen
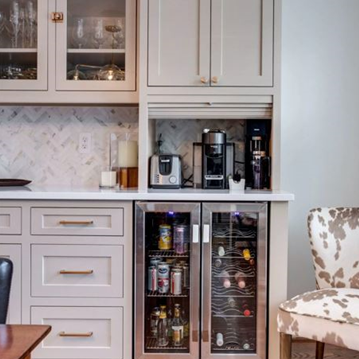
Step 10: Install the cabinetry, countertops, appliances, and fixtures
This is where things start getting exciting, as you begin to see your kitchen come to life! Those materials and elements you so carefully selected will be installed. Your new kitchen cabinets, countertops, kitchen appliances, plumbing, and electrical fixtures will all fall into place, allowing you to finally see your new and improved kitchen.
Dura Supreme Kitchen design by Bath Plus Kitchen
Step 11: Add the finishing touches
Once all the major tasks are completed, it’s a good idea to go back to your list and see what’s left. You can get these done and add the finishing touches. As mentioned earlier, the flooring may be put in last, so this last step will look a little different for different projects. I recommend taking the time to check all the little details before your contractor calls it a wrap.
Dura Supreme Cabinetry design by Bath Plus Kitchen
Step 12: Say hello to your new kitchen!
This is where you remember why you wanted a remodel in the first place! Step into your new kitchen and celebrate all the hard work and brilliant ideas that went into creating a space that you will love for many years to come.
Dura Supreme Cabinetry design by Bath Plus Kitchen